
If you want to improve the performance of your Debian/Ubuntu installation, creating a Swap Space can help you. When the system needs more memory resources than is available, these resources can be moved to virtual space avoiding errors and unexpected interruptions. As this memory is normally allocated on slower access disks, this can compromise your system's speed, so it should be your machine's last resort. Always try to free up more space in your memory by closing unused programs so that you can continue working at normal speed.
Tip on Ubuntu
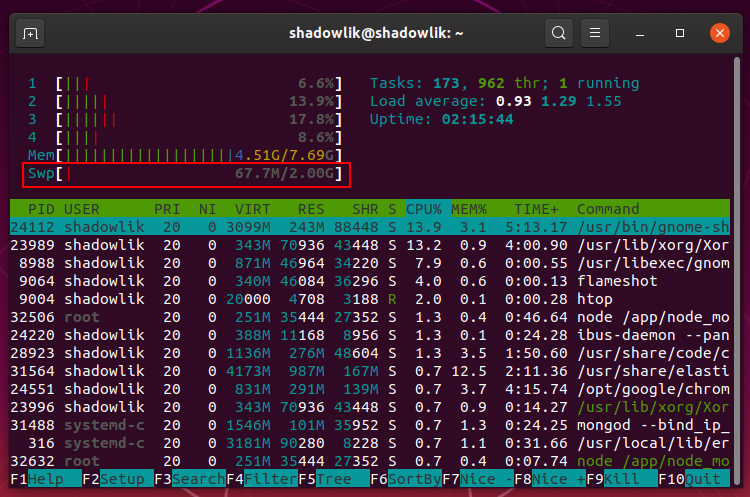
If you are already using the latest versions of Ubuntu, it is very likely that this space was already created automatically during the installation of the operating system. We can check with the utility htop to easily see if there is swap space, amount of free and used allocated space:
In an internet search I found the following tip: The size of your virtual space must be equal to twice your computer's RAM memory or 32 MB, whichever is greater. But it shouldn't be larger than 2048MB (or 2GB).
before starting
Beforehand, let's find out if our system already has a virtual space allocated:
$ sudo swapon --show
If the result is empty, it means that your computer doesn't have an allocated space, otherwise expect a result similar to:
# Result
NAME TYPE SIZE USED PRIO
/swapfile file 2G 67.7M -2
While it's possible, it's not very common to have more than one swap space set up on your computer.
Creating the Swap File
Remember that your user needs to have root permissions for this see here how to create a . In this tutorial we are going to create a virtual space with 2G, if you need less or more space, just replace the number 2 by the amount in GB you want.
$ sudo fallocate -l 2G /swapfile
Users only sudo must have permission to change the file, so let's change their permissions:
$ sudo chmod 600 /swapfile
Now let's use the command mkswap to configure the placeholder as a virtual swap space:
$ sudo mkswap /swapfile
We activate the swap file using the following command:
$ sudo swapon /swapfile
We need to make this change permanent, otherwise on the next system boot your swap space will be lost:
$ sudo echo "/swapfile swap swap defaults 0 0" >> /etc/fstab
We verified that our swap space is active with the command swapon :
$ sudo swapon --show

# Expected outcome
NAME TYPE SIZE USED PRIO
/swapfile file 2G 147.4M -2
Adjusting Swapness
The exchange capacity, swappiness in English, it is a property that defines how much the system will use swap space. Swappiness can have a value between 0 and 100. The smaller the value, the system will try to avoid using space, the larger the system will use that space more aggressively.
The default value of swappiness is 60. You can check the value set on your system with the command:
$ cat /proc/sys/vm/swappiness

# Expected outcome
60
The value of 60 is configured to suit most systems, but if you are configuring this space on a machine used as a server, especially in production environments, it is recommended to use a lower value, around 10 for example:
$ sudo sysctl vm.swappiness=10
Now let's make this permanent change:
$ sudo echo "vm.swappiness=10" >> /etc/sysctl.conf
The optimal value for swappiness depends on your system and the load it will handle. You should adjust as needed.
Removing the Swap File
First we safely disable the Swap file from our system:
$ sudo swapoff -v /swapfile
Remove the change we made to the file /etc/fstab to avoid alerts and startup problems, next let's remove the reserved space so that it doesn't needlessly take up memory:
$ sudo rm /swapfile
For more technical details see: Archlinux – Swap (Portuguese)